...
doing my homework (sorry if there're typos):
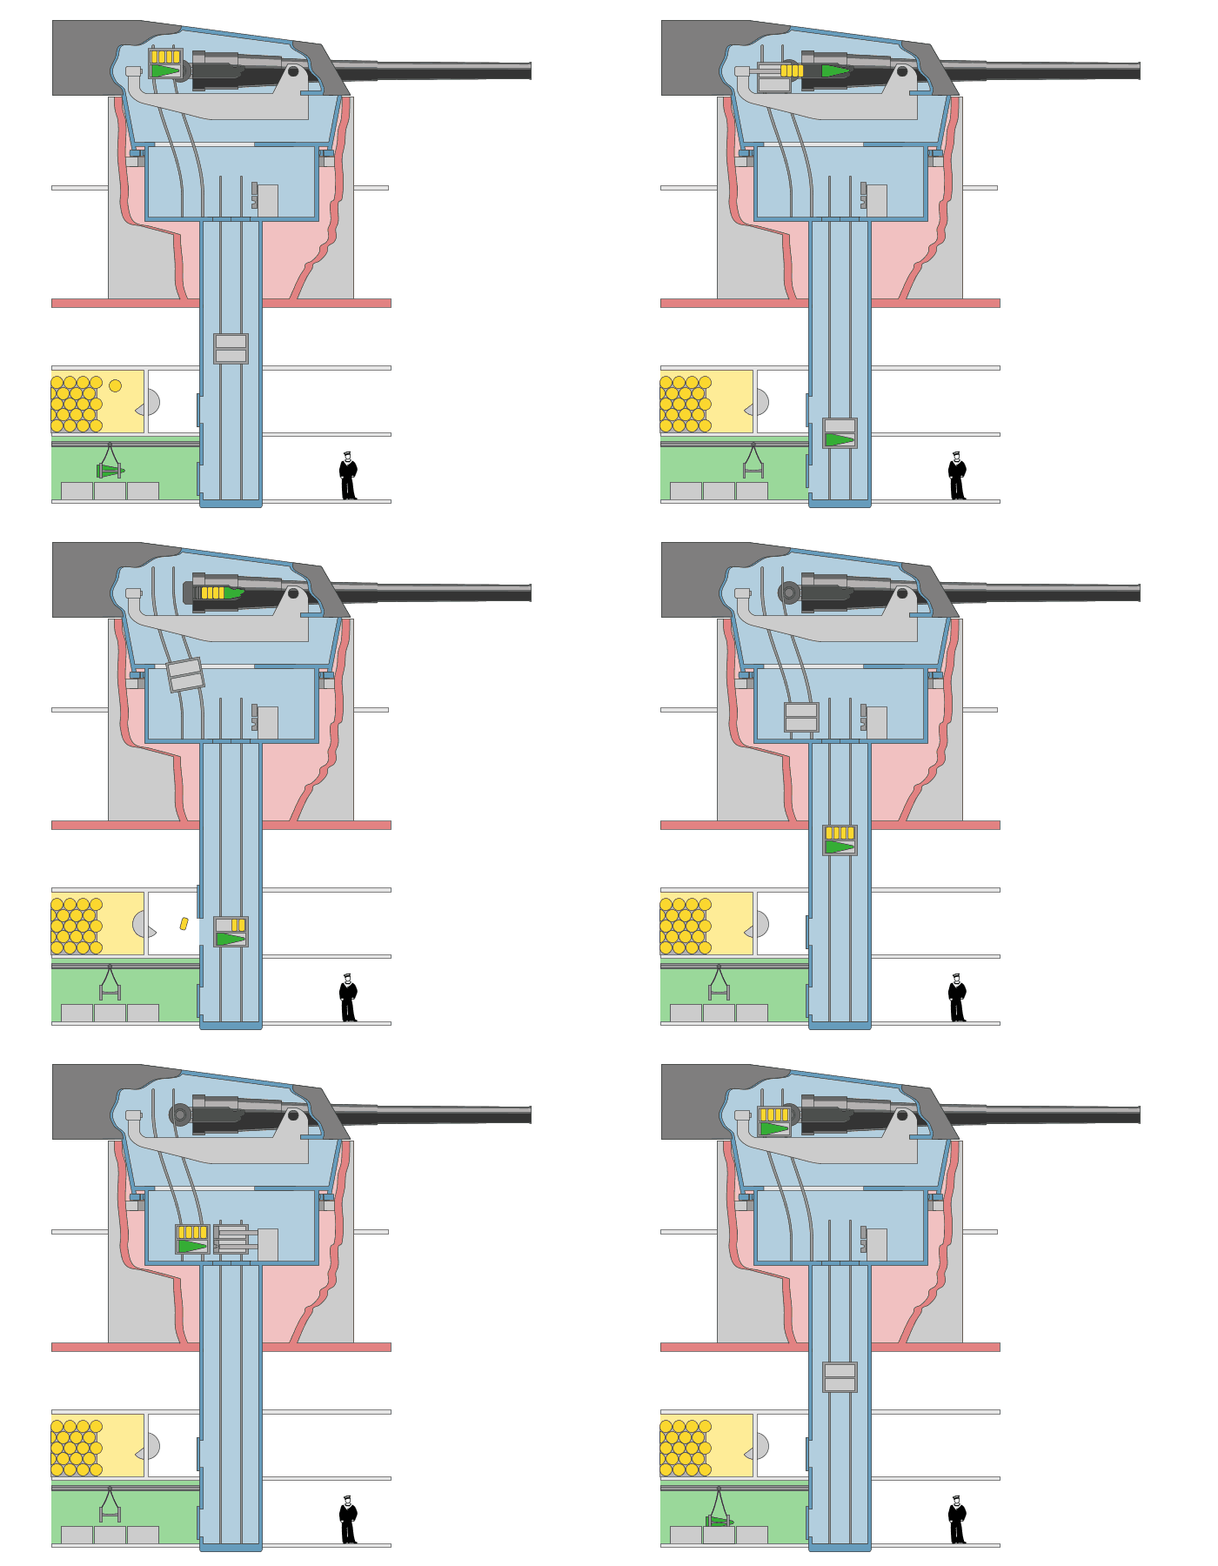
"Magazines were located above shell rooms and quarter-charges were delivered to the handling room via revolving scuttles and then placed by hand in cordite hoppers on the main turret truck. Each hopper had two trays, each holding two quarter-charges which rolled into the hoist cage when the trays were tilted. As there was no shell handling room, shells were carried by overhead hydraulic or hand gear to one of two shell bogies which were then locked to the trunk and the shell entered into the hoist cage by a traversing trolley on the bogie. A shell door then closed the trunk opening. The shell cage picked up the cordite cage and in the working chamber the shell was transferred to the waiting position by a traversing shell carrier and the two half-charges tipped into the totally enclosed upper compartments of the waiting position. From there, shell and charge were rammed into the gun loading cage of the upper hoist, and on arrival at the gun the shell was loaded, followed by the first and then the second half charges dropping one after another into line with the gun axis. etc.:

(source of the text is Campbel's Nav. Weap. of WW2, of the animation: By Emoscopes - Own work, CC BY-SA 2.5,
)
LOL of course I know I'm not going to see the whole turret in London
now something even fancier (from what I figured, the model should be aboard the Belfast:
)
Campbell again:
"Magazines were below the shell rooms and, in the former, quarter charges were run on roller chutes into a hydraulically operated flash-tight cage which raised them the short distance to handing room level. There were four such lifts in A and B magazines, but only two in Y, where the other two were replaced by flashtight double-door scuttles for reasons of level. In the handing room the quarter-charges rolled (or, where there were scuttles, slid) to open waiting trays. From there they were carried to cordite hoppers, mounted one per gun on a circular platform attached to the hoist trunk, and by means of of power rotated scuttles and chain rammers transferred to the lower hoist cage, each tube of which took one half-charge.
In the shell rooms shells were moved by overhead gear and rammed through openings normally closed by watertight doors, over hinged trays to the revolving shell ring in the shell handling room."
now this is something:
"The shell ring held 16 trays in four groups at 90 degrees apart - eight trays in four groups in twin turrets. To load from the shell room it was unclutched from the mounting, clutched to the operating gear on the ship, rotated to the required position for loading and locked to the ship. It was then disconnected from the ship, clutched to the mounting operating gear and rotated to bring a group of shells opposite the flash doors on the trunk, to which it was locked. The shells were rammed into the top cages of the lower hoists."
... gets very technical, then ...
"The lower hoists were operated by winches with two drums of different diameter on the same shaft so that the cordite cage caught up the shell cage, and they arrived in the working chamber together. Here shells and half charges were rammed into traversers which ran on rails across the working chamber until they were in line with the gun loading cage of the particular gun into which shell and half-charges were rammed through bridge trays. The upper hoist raised the gun loading cages until the shell was in line with the gun axis at the loading angle of plus 5 degrees and, after the shell was rammed, the case was twice slightly raised to bring the two half-charges successively into line for ramming.
Flash precautions were very extensive ..." etc.; the picture of the model:
LOL in case you got lost, it's
14-inch (35.6 cm) Mark VII


